
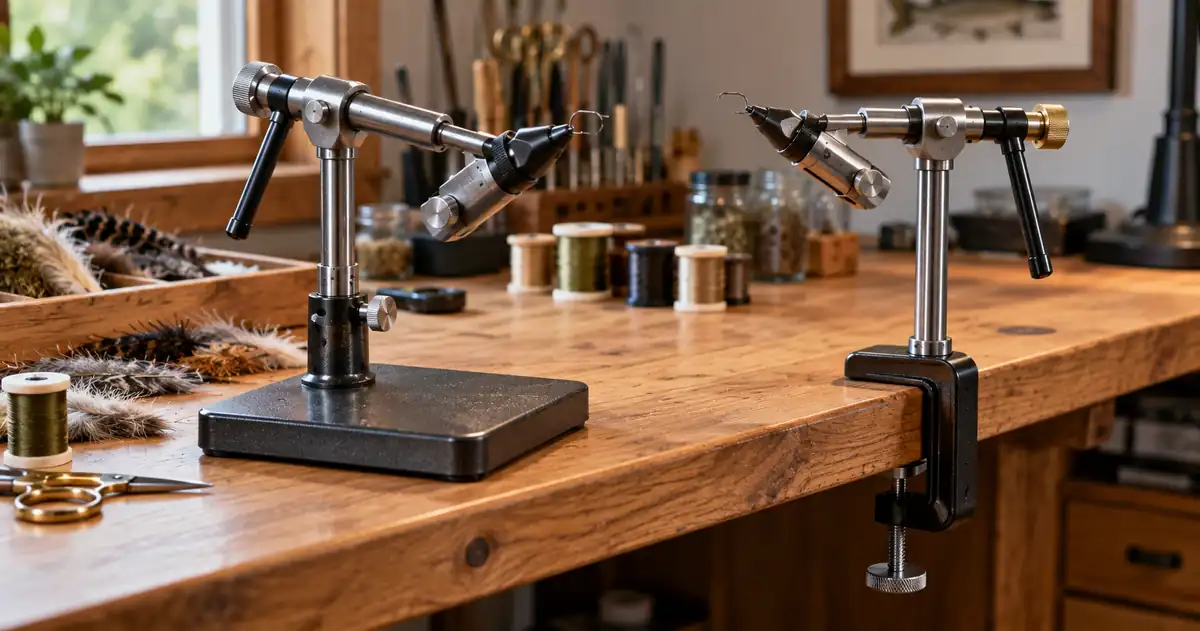
Fly Tying Vise: How to Choose the Right One
A fly tying vise should do one job before anything else: hold the hook securely while giving you enough access to tie the fly cleanly. Rotary features, pedestal bases, specialty jaws, and accessories can all be useful, but they come after reliable hook grip.
The easiest way to choose a fly tying vise is to work backward from the flies you plan to tie. Start with your usual hook sizes, then compare jaw design, rotary function, base style, workspace, and budget. A beginner tying small trout flies does not need exactly the same vise as someone tying large saltwater or predator patterns.
Use this order:
Flies → Hook sizes → Jaws → Rotary function → Base → Workspace → Budget
Table of Contents
What a Fly Tying Vise Must Do
A fly tying vise must hold a hook firmly enough that normal thread tension and material wrapping do not make it slip, rotate unexpectedly, or pull free. It should also leave enough hook access for you to work around the shank, bend, and eye as the pattern requires.
That sounds simple, but it is the foundation of the whole buying decision. A vise with advanced rotary features is still a poor fit if its jaws do not hold the hooks you actually use.
Stability matters too. The vise should stay in position while you apply thread tension, wrap materials, trim fibers, and inspect the fly. How that stability is achieved depends partly on whether you choose a pedestal base or a C-clamp.
Main Parts of a Vise
Most fly tying vises include a few core parts:
- Jaws: grip the hook.
- Vise head: holds the jaw system and may rotate.
- Stem: supports the head and determines working height.
- Base or clamp: secures the vise to the tying surface.
- Tension controls: adjust rotation or jaw pressure, depending on the design.
- Optional accessories: may include a bobbin cradle, material clip, extension arm, or specialty jaws.
Do not assume more parts mean a better vise. The useful question is whether each feature helps with the flies and hooks you expect to tie.
Fly Tying Vise: Rotary vs Non-Rotary
One of the most confusing parts of shopping for a vise is the word “rotary.”
A non-rotary vise holds the hook in a fixed tying position. You can still tie excellent flies on one. It may be all a beginner needs if the priority is secure hook holding and simple operation.
A rotating vise lets you turn the hook to inspect the far side or reach a different angle. That alone can make tying more convenient.
A true in-line rotary system goes further. When the hook is positioned correctly, the shank rotates around its longitudinal axis. That can help when wrapping certain materials evenly around the hook, and it can make inspection easier without repeatedly removing your hands from the work.
What “True Rotary” Means
Do not treat every vise that turns 360 degrees as a true rotary fly tying vise.
Regal currently describes its Medallion series as offering 360-degree rotation and tilt, while its Revolution series is designed for in-line tying. Griffin, by contrast, describes the Odyssey Spider as an entry-level member of its true rotating vise family. Those manufacturer descriptions show why the exact type of rotation matters more than the word “rotary” by itself.
If full in-line rotation matters to you, check the manufacturer’s description and setup instructions rather than assuming that any rotating head provides the same function.
Do Beginners Need True Rotary?
No. A beginner does not need true rotary operation to learn how to tie flies.
A basic vise that grips hooks securely can teach thread control, proportions, material placement, trimming, and finishing. Those skills matter regardless of whether the hook rotates on-axis.
True rotary becomes more valuable when you want to use rotation as part of the tying process, such as making controlled material wraps or repeatedly viewing all sides of the fly.
For a first vise, prioritize reliable jaws and a stable setup before paying specifically for advanced rotation.
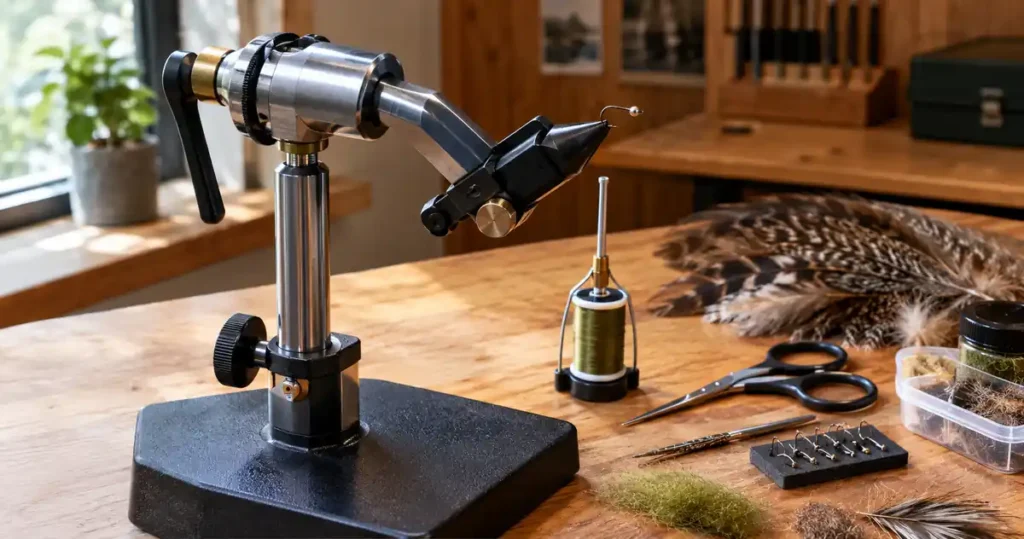
Fly Tying Vise: Pedestal vs C-Clamp
The base changes how the vise sits on your tying surface.
Neither pedestal nor C-clamp is universally better. The right choice depends on where you tie, how permanent the workspace is, and whether the table can accept a clamp.
Pedestal Base
A pedestal vise sits on a weighted base placed directly on the table.
The main advantage is flexibility. You can move the vise around the desk, use it on tables that cannot accept a clamp, and pack it away without attaching hardware to furniture.
PEAK’s current rotary pedestal model uses a steel pedestal base with non-marking feet and a removable vise stem. The manufacturer also includes a hook-and-bead pocket and accessory mounting holes in the base.
The trade-off is that pedestal stability depends on the weight and design of the base. A light base can move if you apply heavy thread tension or work on large hooks.
C-Clamp
A C-clamp secures the vise to the edge of a table or bench.
This can provide a stable setup while keeping the tying surface itself relatively clear. It can also allow more flexibility in stem height because the vise is not sitting on top of a thick pedestal.
PEAK’s current C-clamp rotary model accepts table thicknesses from about 11/16 inch to 2-1/4 inches according to the manufacturer. That is a useful reminder to measure your actual table before choosing a clamp.
The limitation is obvious: the table needs an accessible edge with a thickness and shape the clamp can grip safely. A C-clamp may also be a poor choice for delicate furniture or a temporary workspace where you cannot leave the vise attached.
Which Base Should You Choose?
Choose a pedestal if you regularly move your tying station, use different tables, or cannot clamp to the work surface.
Choose a C-clamp if you have a suitable dedicated table edge and want a firm mounting point without a heavy base taking up desk space.
If both formats are available for the vise you want, choose from your workspace first rather than assuming one version performs better simply because it costs more.
How Hook Size Affects Fly Tying Vise Choice
Hook size is one of the most important specifications to check before buying a vise.
The flies you tie determine the hooks you use, and the hooks determine what the jaws need to hold. Tiny trout patterns and large saltwater or predator flies place very different demands on a jaw system.
If you are still learning how dry flies, nymphs, wet flies, and streamers differ, our guide to types of fly fishing flies can help you identify the patterns you are most likely to tie.
Manufacturer hook ranges are useful starting points. Renzetti currently lists its Apprentise rotary vise for hooks from #28 to #2. Griffin lists the Odyssey Spider with a jaw capacity from #28 to 4/0. PEAK states that its standard rotary jaws hold hooks from 2/0 down to very small sizes. These are manufacturer specifications, not a promise that every hook shape and wire diameter within a nominal size will feel identical in the jaws.
Think about the actual patterns you want to make most often. If you mainly tie trout dries and nymphs, access around smaller hooks may matter more than capacity for very large hooks. If you tie large streamers or saltwater flies, jaw strength, hook-wire capacity, and room around the hook become more important.
If trout patterns are your main focus, our guide to the best flies for trout fishing can help you narrow down the patterns and hook sizes you are most likely to tie.
Do You Need Specialty Jaws?
Usually not for a first general-purpose vise.
Specialty jaws become useful when your tying falls outside the comfortable range of standard jaws. PEAK, for example, currently sells separate midge jaws designed for greater access around small hooks and larger specialty systems for heavier hook wire.
That does not mean every tier needs multiple jaw sets. Buy specialty jaws when your patterns create a specific problem that standard jaws cannot solve.
Fly Tying Vise Features Worth Paying For
Once you know your hook range and base preference, compare the features that affect daily tying.
Reliable Hook Grip
Hook grip comes first.
The vise should hold the hook without requiring unreasonable pressure and without letting it twist when you apply ordinary tying tension. Follow the manufacturer’s jaw-placement instructions because clamping a hook incorrectly can reduce grip and may damage the jaws.
Smooth and Controllable Rotation
If you choose a rotary fly tying vise, look for rotation that can be adjusted to suit the way you tie.
PEAK’s current rotary models include adjustable rotation resistance, while the Renzetti Apprentise uses a rotary head with a tension screw. The mechanisms differ, but the goal is similar: the hook should stay where you put it while still allowing useful rotation when you want it.
Useful Working Height and Adjustment
A vise that sits too low or too high can make long tying sessions uncomfortable.
Look at stem length, head angle, and whether the design lets you position the hook where your hands and eyes naturally work. Pedestal height, table height, chair height, and C-clamp position all influence the final working position.
Replacement Parts and Jaws
A vise can last much longer than many other tying tools, so parts support matters.
Check whether the manufacturer still sells replacement jaws, bases, clamps, stems, or accessories for the model you are considering. PEAK currently offers standard, midge, saltwater, and specialty jaw options across its vise system, although compatibility varies by model.
Do not assume every jaw from the same brand fits every vise.
Left- or Right-Hand Configuration
Some rotary controls and accessory positions are easier to use from one side than the other.
PEAK states that the rotation-resistance control on its current rotary vise can be manipulated by right- or left-handed tiers. For any model you are considering, look at the handle, bobbin cradle, tension controls, and material clips to make sure the layout works with your tying hand.
Warranty and Manufacturer Support
A warranty does not automatically make one vise better than another, but it is worth checking when you are buying a tool intended to last.
PEAK currently lists a limited lifetime warranty against defects in materials or workmanship on its rotary and non-rotary vises. Warranty language can change, so check the manufacturer’s current terms before relying on it as part of the purchase decision.
How to Choose a Fly Tying Vise for Beginners
A beginner should keep the decision simple.
Start with the patterns you want to tie, identify the hook sizes those patterns use, and make sure the jaw system covers that range. Then decide whether you want true rotary operation or simply a vise that can rotate for inspection. Finally, choose the base that fits your tying space.
A practical order is:
- Patterns: What flies will you tie most?
- Hook sizes: What range do those flies use?
- Jaws: Can the vise hold those hooks securely?
- Rotary need: Do you need true in-line rotary operation, basic rotation, or neither?
- Base: Does a pedestal or C-clamp fit your workspace better?
- Budget: Which model gives you the features you will actually use?
Current products show how different combinations can suit different beginners.
The Renzetti Apprentise is a relatively simple example with a rotary head, tension screw, C-clamp, and manufacturer-listed #28-to-#2 hook range. The Griffin Odyssey Spider adds true rotating operation and a broader manufacturer-listed #28-to-4/0 jaw range. PEAK offers both rotary and non-rotary models, plus pedestal and C-clamp choices across its lineup. These are examples of feature combinations, not a best-to-worst ranking.
If you would rather try the basics before building a full tying bench, our guide to fly fishing classes near me explains how to find local shops and programs. Some local fly shops also offer fly tying classes, so you may be able to handle different vises before deciding what to buy.
Fly Tying Vise Buying Mistakes
A good vise can still be the wrong purchase if you choose it for the wrong reason.
Buying on Price Alone
The cheapest vise is not automatically the best value, and the most expensive vise is not automatically the best fit.
Start with hook grip, range, and workspace. Then compare features that solve an actual need.
Assuming Any 360-Degree Rotation Is True Rotary
A head that turns can be useful, but that does not necessarily mean the hook rotates on-axis for in-line rotary tying.
Read the manufacturer’s description carefully if true rotary operation is important to you.
Ignoring Hook Sizes
Do not buy a vise because it looks versatile without checking the jaw range.
A vise designed around ordinary trout hooks may not be ideal for very heavy saltwater hooks, and a large-hook setup may give you less access around tiny patterns.
Choosing the Wrong Base for Your Desk
Measure the work surface before buying a C-clamp.
Check edge thickness, lip shape, drawers, supports, and whether clamping is appropriate for the furniture. If the table is unsuitable, a pedestal may save you from buying a second base later.
Paying for Features You Will Not Use
A premium rotary system, specialty jaws, multiple accessory arms, and elaborate storage can all be useful to the right tier.
They are not mandatory for learning. If you are unsure, spend first on secure hook holding and a stable work position.
Ignoring Replacement Parts
Check whether the model has current support before buying an older or heavily discounted vise.
A low purchase price may be less attractive if replacement jaws or proprietary parts are difficult to find later.
Fly Tying Vise FAQs
Do You Need a Rotary Fly Tying Vise?
No. You can tie flies effectively on a non-rotary vise. Rotary operation is a convenience and, in true in-line systems, can also become part of the tying technique. Beginners should prioritize secure hook holding before paying specifically for rotary features.
Is a Pedestal or C-Clamp Fly Tying Vise Better?
Neither is universally better. A pedestal is easier to move and works on tables that cannot accept a clamp. A C-clamp can provide a stable attachment while using less tabletop space, but it requires a suitable table edge.
What Hook Sizes Should a Fly Tying Vise Hold?
It should hold the hook sizes you actually plan to use. Trout tiers may prioritize smaller hooks, while streamer and saltwater tiers may need capacity for larger or heavier hooks. Check the manufacturer’s stated range and any specialty-jaw options before buying.
How Much Should a Beginner Spend on a Fly Tying Vise?
There is no single correct amount. Set the budget after deciding the hook range, base, and rotary features you need. Spending more can buy smoother mechanisms, broader adjustment, refined jaws, or stronger support, but beginners do not need every premium feature to learn.
Can One Fly Tying Vise Handle Both Trout and Saltwater Flies?
Some vises cover a broad hook range, but nominal hook size is only part of the issue. Large saltwater hooks can use heavier wire, while small trout hooks demand fine access around the jaws. If you regularly tie at both extremes, check the manufacturer’s jaw specifications and whether dedicated small- or large-hook jaws are available.
Final Thoughts on Choosing a Fly Tying Vise
Choose a fly tying vise from the flies backward.
Start with the patterns and hook sizes you expect to tie. Make sure the jaws can hold them securely. Then decide whether rotary operation adds value for the way you want to work, choose a pedestal or C-clamp that fits your tying space, and set your budget around features you will actually use.
For a beginner, reliable hook grip and a stable setup matter more than owning the most advanced vise. Once your tying style becomes clearer, you can decide whether true rotary operation, specialty jaws, or additional accessories are worth adding.
Sources Used
Renzetti — Renzetti Apprentise Vise C-Clamp A6001
Used to verify the current #28–#2 hook range, rotary head, tension screw, hinged stem, jaws, and C-clamp configuration.
Renzetti Apprentise Vise C-Clamp A6001
Griffin Enterprises — Odyssey Spider Vise
Used to verify Griffin’s current “true rotating” description and #28–4/0 jaw capacity.
Griffin Odyssey Spider Vise
PEAK Fishing — PEAK Rotary Vise with Pedestal Base
Used to verify the current standard-jaw hook range, hardened tool-steel jaws, rotation adjustment, pedestal features, and warranty.
PEAK Rotary Vise with Pedestal Base
PEAK Fishing — PEAK Rotary Vise with C-Clamp
Used to verify the current clamp range and mounting design.
PEAK Rotary Vise with C-Clamp
PEAK Fishing — Midge Jaws and Specialty Vises
Used to verify current specialty-jaw options and their intended applications.
PEAK Midge Jaws
PEAK Specialty Vises
Regal Vise — FAQs and Product Range
Used to distinguish Medallion 360-degree rotation from Revolution in-line rotary functionality.
Regal Vise FAQs
Regal Vise Products