
Fly Tying Tools: What Beginners Actually Need
You do not need a drawer full of fly tying tools to start making flies.
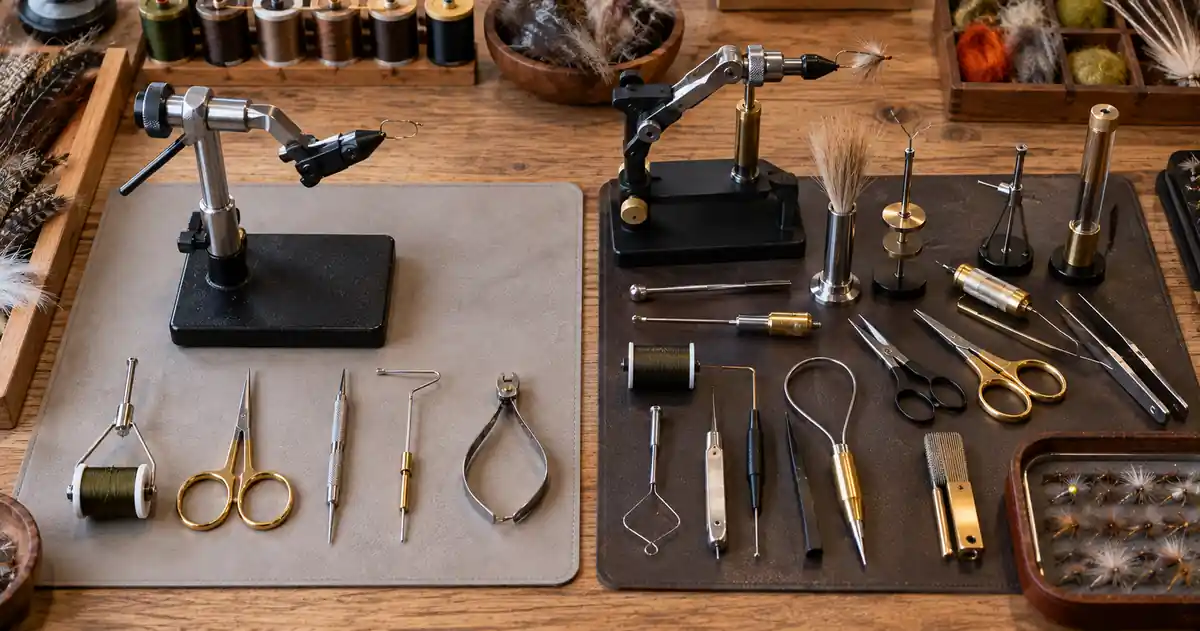
A beginner can build a functional bench around three core tools: a vise, bobbin, and good pair of scissors. Add a bodkin and whip finisher soon after. Tools such as hackle pliers and hair stackers become important when the patterns you tie actually require them.
A useful buying order is:
Need Now → Useful Soon → Pattern-Dependent → Upgrade Later
One important warning: a product called a “fly tying tool kit” does not necessarily include a vise.
If you’re still deciding what kinds of flies you eventually want to tie, our guide to the main types of fly fishing flies can help you understand which patterns and materials your future tool choices may need to support.
Table of Contents
The Fly Tying Tools You Need First
| Tool | Priority | Main Job |
|---|---|---|
| Vise | Need now | Holds the hook securely |
| Bobbin | Need now | Holds and controls tying thread |
| Scissors | Need now | Cuts thread and materials |
| Bodkin | Useful soon | Picks fibers, clears hook eyes, applies cement |
| Whip finisher | Useful soon | Creates a secure finishing knot |
| Hackle pliers | Pattern-dependent | Grips hackle while wrapping |
| Hair stacker | Pattern-dependent | Aligns hair tips |
| Bobbin threader | Convenience | Pulls thread through bobbin tube |
This is enough to help you prioritize spending before looking at large kits.
Fly Tying Vise: The Foundation of the Bench
The vise holds the hook.
That sounds simple, but secure hook holding is the foundation of almost every tying step.
A beginner vise should:
- Hold the hook without slipping
- Fit the hook sizes you expect to tie
- Mount securely to your workspace
- Allow comfortable access around the hook
You do not need the most expensive rotary vise available to learn thread control and proportions.
C-Clamp vs. Pedestal
A C-clamp vise attaches to the edge of a desk or table.
Advantages:
- Very secure when properly mounted
- Compact
- Often lighter than a pedestal base
Limitations:
- Requires a suitable table edge
- Can mark some furniture
- Less convenient if you move between workspaces
A pedestal vise sits on a weighted base.
Advantages:
- Easy to reposition
- Does not require clamping to furniture
- Convenient for kitchen tables or temporary tying stations
Limitations:
- Bulkier to carry
- Stability depends on the base and how aggressively you tie
Neither is automatically better.
Choose according to where you actually plan to tie.
Fixed vs. Rotary Vise
A fixed vise simply holds the hook in a working position.
A rotary vise can rotate the hook around an axis, which can make some material-wrapping and inspection tasks more convenient.
True rotary function can be useful, but it is not required to learn:
- Thread wraps
- Tails
- Bodies
- Wings
- Hackle
- Basic finishing
For a beginner, secure hook holding should come before paying extra for rotary features that may not be used.
Fly Tying Bobbin
A fly tying bobbin holds a spool of thread and lets you feed that thread around the hook while maintaining control.
Look for:
- Smooth thread delivery
- A tube that does not damage thread unnecessarily
- Comfortable finger loops or frame shape
- Enough tension to keep the thread controlled
You do not need five bobbins immediately.
One dependable general-purpose bobbin is enough to start.
Extra bobbins become convenient later when you keep several thread colors or sizes ready on the bench.
Fly Tying Scissors
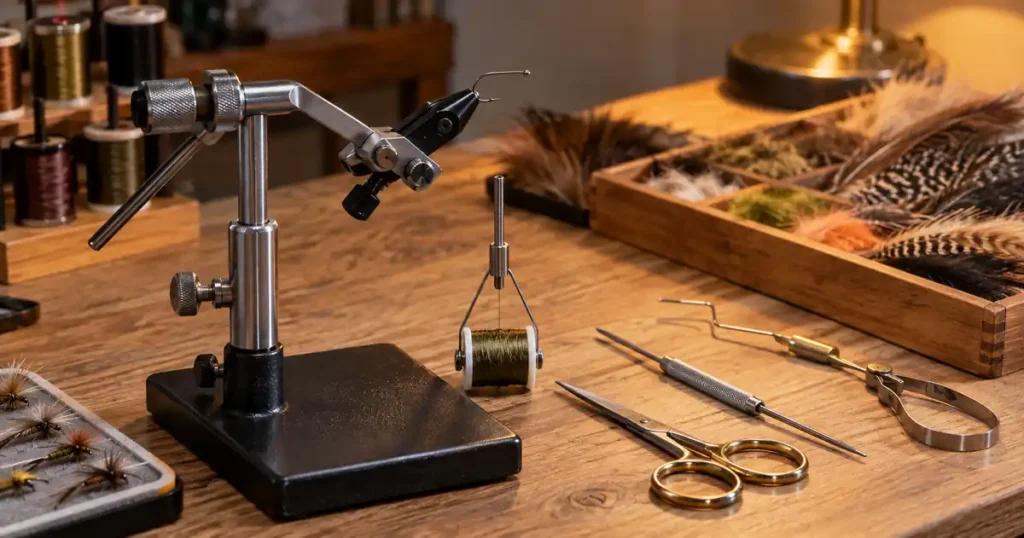
A fine pair of scissors is one of the tools you will touch constantly.
For general trout flies, look for:
- Fine points
- Clean cutting action
- Comfortable loops
- Enough control for trimming close to the hook
Do not use your best fine-point fly tying scissors to cut heavy wire or other materials that can damage the blades.
If you eventually tie large streamers or lots of hair, a heavier second pair can make sense.
But one good pair should come before collecting several specialized scissors.
Bodkin
A bodkin is essentially a fine needle tool.
It is useful for:
- Clearing cement from a hook eye
- Separating trapped fibers
- Picking dubbing
- Applying small amounts of head cement or resin
- Moving materials into position
It is inexpensive, simple, and versatile.
You can improvise some of these tasks with other fine tools, but a bodkin earns its place quickly on a beginner bench.
Whip Finisher
A whip finisher helps create a finishing knot around the hook shank.
It is useful because it makes repeated, neat finishing wraps easier once you understand the movement.
A whip finisher is not magic, and it is not the only possible way to finish a fly. Hand whip finishes and half hitches also exist.
Still, for many beginners, a dedicated whip finisher is worth buying early because finishing the fly cleanly becomes much easier with practice.
Hackle Pliers
Hackle pliers grip a feather stem while you wrap it around the hook.
They become especially useful for:
- Dry-fly hackle
- Soft hackles
- Palmered hackle
- Woolly Bugger-style patterns
If your first patterns are simple thread-bodied nymphs without wrapped hackle, you may not need hackle pliers on day one.
Buy them when your tying actually reaches that step.
Hair Stacker
A hair stacker aligns the tips of materials such as deer or elk hair.
It becomes useful for patterns including:
- Elk Hair Caddis
- Hair-wing flies
- Some terrestrial patterns
- Other flies where aligned hair tips matter
You can tie many nymphs and streamers without one.
That is why it belongs in the pattern-dependent tier rather than the absolute essentials.
Tools That Can Wait
A beginner does not normally need all of these immediately:
- Dubbing-loop spinner
- Multiple specialty bobbins
- Three or four types of scissors
- UV curing light
- Specialty vise jaws
- Tube-fly accessories
- Advanced rotary accessories
- Large tool caddy
- Specialized hair scissors
- Multiple hair stackers
These tools can be excellent once your patterns create a need for them.
Buying them before you know what you tie can turn a simple hobby into an expensive collection of unused hardware.
Should Beginners Buy a Tool Kit?
A tool kit can be convenient, but read the contents carefully.
Some kits are collections of hand tools, not complete tying setups.
Loon Core Fly Tying Tool Kit
The current Loon Core Fly Tying Tool Kit is listed at $70 at the time of research.
It includes core hand tools such as:
- Scissors
- Bobbin
- Bodkin
- Whip finisher
- Hackle pliers
- Storage case
It does not solve the vise requirement.
That makes it useful if you already own a vise or plan to choose one separately.
Umpqua Dreamstream+ Essential 5-Piece Tool Kit
The current Umpqua Dreamstream+ Essential 5-Piece Tool Kit is listed at $71.99 at the time of research.
It includes:
- Standard bobbin
- Bodkin
- Whip-finishing tool
- Hackle plier
- 3.5-inch arrow-point scissors
Again, no vise is included.
Umpqua Dreamstream+ Core 7-Piece Tool Kit
The current Umpqua Dreamstream+ Core 7-Piece Tool Kit is listed at $93.99.
It adds more hand-tool coverage, including tools such as a threader and hair stacker.
That is useful if you know you will use them, but it still does not replace the vise.
PEAK Trailhead Package
The PEAK Trailhead Package takes a different approach.
It includes a PEAK rotary vise along with core tools such as:
- Scissors
- Whip finisher
- Bobbin
- Hackle plier
- Threader
- Hair stacker
- Multi-purpose dubbing/pick tool
- Desktop organizer
It can be ordered with a pedestal or C-clamp configuration.
This is much closer to a complete tool setup, though you will still need hooks, thread, and tying materials.
Quick Kit Comparison
| Kit | Vise Included? | Best Fit |
|---|---|---|
| Loon Core Tool Kit | No | Already choosing vise separately |
| Umpqua Essential 5-Piece | No | Core hand tools |
| Umpqua Core 7-Piece | No | Broader hand-tool set |
| PEAK Trailhead | Yes | More complete tool setup |
The lesson is simple:
Do not buy a kit based on the word “kit.” Read the contents.
How Much Should You Spend?
There is no magic beginner budget.
Spend first on:
- A vise that securely holds the hooks you plan to use.
- A bobbin that handles thread smoothly.
- Scissors that cut accurately.
- A few inexpensive supporting tools.
Then add equipment as your tying develops.
A $20 specialty tool you never use is worse value than a simple tool that solves a problem every time you sit at the bench.
What to Look for Before Buying
Hook Range
Make sure your vise can hold the hook sizes you expect to tie.
Someone tying tiny trout midges has different requirements from someone making large saltwater flies.
Workspace
Choose pedestal or C-clamp according to your actual table.
Kit Contents
Check whether you are buying:
- A vise
- Hand tools
- Materials
- Hooks
- Or some combination
Duplicates
A large kit can contain tools you already own or do not need.
Pattern Relevance
Ask:
“What tying step will this tool help me perform?”
If you cannot answer, you probably do not need it yet.
Common Beginner Buying Mistakes
Buying Tools Before Choosing Patterns
Pick a few simple flies you want to learn first.
Then buy the tools those patterns require.
Buying a Tool Kit Without a Vise
This is easy to do because several high-quality kits contain only hand tools.
Paying for Rotary Features Too Early
Rotary function can be useful, but learning basic thread control matters more.
Buying Too Many Scissors
Start with one precise pair.
Add specialized cutting tools when necessary.
Buying Hackle and Hair Tools Before Using Those Materials
Pattern choice should drive the purchase.
Ignoring Comfort
You may hold a bobbin or scissors for hours over time.
Ergonomics matter more as your tying sessions become longer.
Simple Beginner Bench Checklist
A functional first bench can include:
Need now
- Vise
- Bobbin
- Fine-point scissors
Useful soon
- Bodkin
- Whip finisher
Add with the right patterns
- Hackle pliers
- Hair stacker
- Bobbin threader
Then buy:
- Hooks
- Thread
- Materials for specific patterns
You do not need an entire fly shop on the first day.
FAQs
What Fly Tying Tools Do Beginners Need?
Start with a vise, bobbin, and fine scissors. A bodkin and whip finisher are useful early additions. Hackle pliers and a hair stacker become more important when the flies you tie require those materials.
Do I Need a Rotary Fly Tying Vise?
No. A standard vise that holds hooks securely is enough to learn fly tying. Rotary function becomes useful for certain techniques and material wraps, but it is not a prerequisite.
Do I Need a Whip Finisher?
You can finish flies without one, but a whip-finishing tool makes it easier to create repeatable finishing knots. It is a useful early purchase rather than an absolute requirement.
Are Fly Tying Tool Kits Worth It?
They can be, provided the tools match what you need and the package is priced reasonably. Always check what is included instead of assuming every kit provides a complete bench.
Do Fly Tying Tool Kits Include a Vise?
Not always. Several current Loon and Umpqua tool kits contain bobbins, scissors, whip finishers, and other hand tools but no vise. Check the contents before buying.
Final Takeaway
The best way to choose fly tying tools is to start with the tying steps you need to perform.
Buy a secure vise, dependable bobbin, and precise scissors first. Add a bodkin and whip finisher, then let the patterns you actually tie determine what comes next.
A smaller bench full of tools you understand is far more useful than a large kit filled with accessories you never touch.
Sources Used — Not Part of the Article:
- Loon Outdoors — Core Fly Tying Tool Kit / Current Tool Collection — current $70 price and product availability.
Loon Outdoors — Core Fly Tying Tool Kit - Umpqua Feather Merchants — Dreamstream+ Essential Tying Tool Kit 5PC — current contents and $71.99 price.
Umpqua — Dreamstream+ Essential 5-Piece Kit - Umpqua Feather Merchants — Fly Tying Kits — current Core 7-Piece price and current kit lineup.
Umpqua — Fly Tying Kits - PEAK Fishing — PEAK Trailhead Package with Pedestal Base — current included rotary vise and tool package.
PEAK Fishing — Trailhead Package