
Fly Fishing Line Setup: How to Rig from Reel to Fly
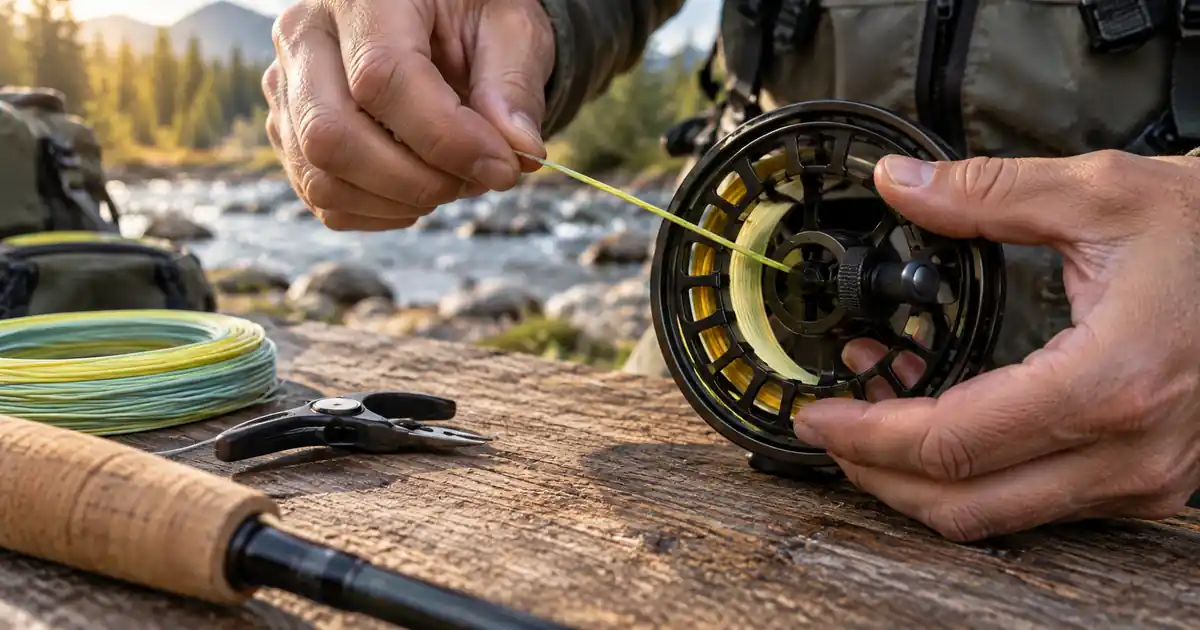
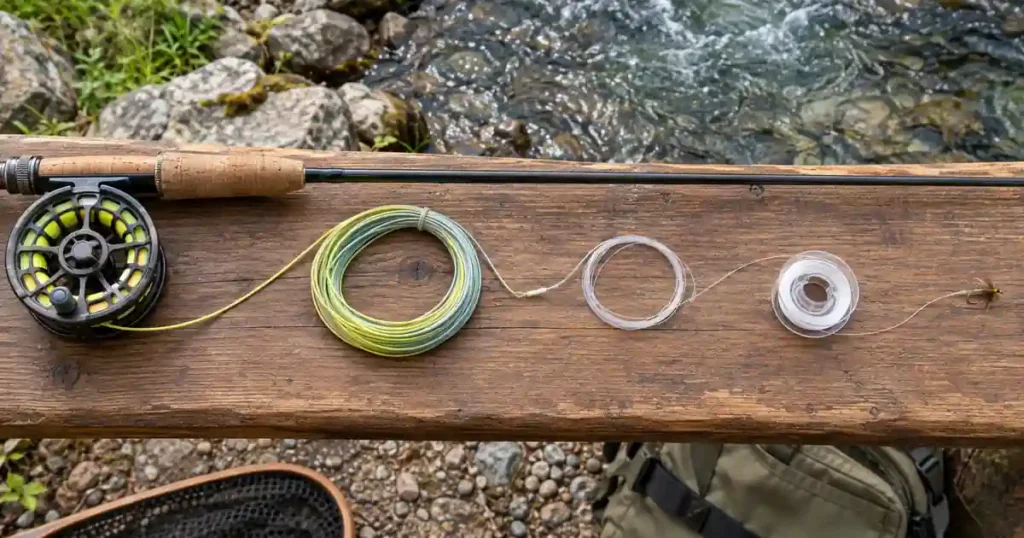
A fly fishing line setup follows one simple order: reel, backing, fly line, leader, tippet when needed, and finally the fly. Each part has a different job, and the easiest way to rig an empty reel is to build that system one connection at a time.
This guide focuses on the line system itself. It does not repeat the physical rod-assembly process. If your reel is empty or you are replacing an old line, use this sequence:
Reel → Backing → Fly Line → Leader → Tippet → Fly
A reliable fly fishing line setup is easier to understand if you remember six actions:
Anchor → Back → Cast → Taper → Finish → Inspect
Table of Contents
Fly Fishing Line Setup: Quick Answer
To build a fly fishing line setup, attach backing securely to the reel arbor, wind on the amount appropriate for your reel and fly line, connect the backing to the rear of the fly line, spool the line in the correct direction, attach a tapered leader, add tippet if needed, and tie on the fly. Finish by checking spool clearance and every connection.
| Position | Component | Main Job |
|---|---|---|
| 1 | Reel | Stores the complete line system |
| 2 | Backing | Adds reserve line and helps fill the spool |
| 3 | Fly line | Provides the mass used to cast |
| 4 | Leader | Tapers from thick fly line toward fine terminal material |
| 5 | Tippet | Provides a fine, replaceable connection near the fly |
| 6 | Fly | Presents the imitation to the fish |
You do not need the same knot at every junction. First identify what two materials must be joined, then choose a connection that suits those materials and the equipment you actually have.
What You Need for a Fly Fishing Line Setup
Before building a fly fishing line setup, lay out every component so you do not discover halfway through that the line, reel, or leader is incompatible.
Fly Reel
The reel must have enough capacity for the intended fly line plus an appropriate amount of backing.
Reel capacity varies by model and spool size, so check the manufacturer’s specifications instead of assuming that every 5-weight, 8-weight, or saltwater reel holds the same amount.
If you are still choosing a reel, see our guide to choosing the right fly fishing reel.
Backing
Backing is the thin line that goes on the reel before the fly line.
It serves two practical purposes:
- It adds reserve line if a fish runs beyond the end of the fly line.
- It helps fill the reel spool so the fly line does not sit on an unnecessarily small arbor.
Not every trout angler regularly sees backing leave the reel during a fish fight, but the backing still forms part of the complete system.
Fly Line
The fly line is the thick coated line that provides the mass used to load the rod and make a fly cast.
For a basic setup, confirm that:
- The line weight is suitable for the intended rod and reel.
- You know which end connects to the backing.
- You know which end faces the leader.
- The line type suits the fishing you plan to do.
This guide does not turn into a floating-versus-sinking buying guide. The important setup point is direction: the rear end goes toward the backing, while the tapered casting end goes toward the leader.
Tapered Leader
The leader connects the thick fly line to the much finer terminal end of the system.
A tapered leader helps transition from the mass of the fly line toward the fly.
Many modern leaders include a loop at the butt end, but not all equipment uses the same connection system.
Tippet
Tippet is the fine terminal material that connects to the fly.
A new knotless tapered leader already ends in a tippet section. Extra tippet is therefore not automatically required the moment you open a new leader.
You may add tippet when the leader shortens after repeated fly changes, when you need a different diameter, or when a particular rig calls for a separate section.
Fly
The fly is the final component.
Keep the hook secured until the rest of the line system is complete. This reduces the chance of catching your hand, clothing, furniture, or another person while spooling.
Basic Tools
A simple setup is easier with:
- Nippers or line cutters
- The reel manufacturer’s capacity information
- The fly-line packaging or instructions
- A clean workspace
- A way to hold the fly-line spool so it can rotate freely
Fly Fishing Line Setup Step 1: Attach Backing to the Reel
The first working step in a fly fishing line setup is attaching backing to the reel arbor.
Find the Reel Arbor
Remove the reel spool if the design makes that easier and locate the center arbor.
Make sure the spool is clean and that you understand the direction in which the line should wind onto the reel.
Attach the Backing
An Arbor Knot is a common basic connection for fastening backing to the reel arbor.
The knot only needs to anchor the backing securely so it does not slip while you begin winding. If you need the full knot sequence, our fly fishing knots for beginners guide covers the reel-to-fly connections in more detail.
Wind the Backing Evenly
Wind the backing across the spool under controlled, even tension.
Move the backing from side to side so it builds in reasonably level layers rather than forming one tall pile in the center or against one edge.
Avoid extreme pressure. The goal is a firm, tidy spool, not crushing tension.
Do not cut the backing until you are confident about the amount you need.
Fly Fishing Line Setup Step 2: Connect Backing to Fly Line
The next junction in the fly fishing line setup is backing to fly line.
Before tying anything, inspect the rear end of the fly line.
Check for a Rear Factory Loop
Some modern fly lines have a welded loop at the backing end.
When the rear loop is present, intact, and intended for this connection, a backing loop can be joined to it loop-to-loop.
The backing loop needs to be large enough for the fly-line spool or coiled line to pass through when making the connection.
If There Is No Rear Loop
A line without a rear welded loop can be connected using an appropriate direct knot.
Common recognized options include:
- Nail Knot
- Albright Knot
The best choice can depend on the backing material and fly line. Follow the line manufacturer’s instructions when they specify a preferred connection.
Do not add a complicated big-game connection simply because it exists. Heavy saltwater and specialty systems can require different rigging from a basic freshwater reel.
Inspect the Connection
Before spooling the fly line:
- Seat the connection properly.
- Trim tags carefully.
- Check for obvious slipping.
- Give the junction an appropriate controlled pull test.
- Make sure no sharp or bulky tag end is positioned to catch unnecessarily.
A clean connection matters because it may need to pass through rod guides if a fish takes enough line to reach the backing.
Fly Fishing Line Setup Step 3: Spool the Fly Line Correctly
The most important direction check in a fly fishing line setup happens before the fly line is wound onto the reel.
Identify the Backing End
Do not assume both ends of a fly line are interchangeable.
Many lines or their packaging identify which end goes to the reel. If the line is marked, follow that marking. If it is not obvious, check the manufacturer’s instructions for the exact line.
The rear end connects to backing. The tapered casting end eventually connects to the leader.
Let the Line Spool Rotate
Do not simply place the new fly-line coil on the floor and pull line off randomly.
Let the line spool rotate as you wind. This helps reduce unnecessary twisting during installation.
Keep the line clean and away from rough surfaces.
Wind Under Controlled Tension
Wind the fly line onto the reel evenly.
Use enough tension to produce a tidy spool, but avoid excessive force.
Guide the line across the spool so it does not stack heavily on one side.
Avoid Overfilling the Reel
When the complete fly line is installed, it should not rub the reel frame.
Leave enough clearance for normal winding. Real fishing rarely lays line back onto a reel in perfectly even factory-style layers.
If the spool is packed completely to the edge, a slightly uneven retrieve can cause the line to rub or bind.
If the full fly line does not fit comfortably, the solution is usually to reduce the amount of backing rather than force the line onto the spool.
Fly Fishing Line Setup Step 4: Add Leader and Tippet
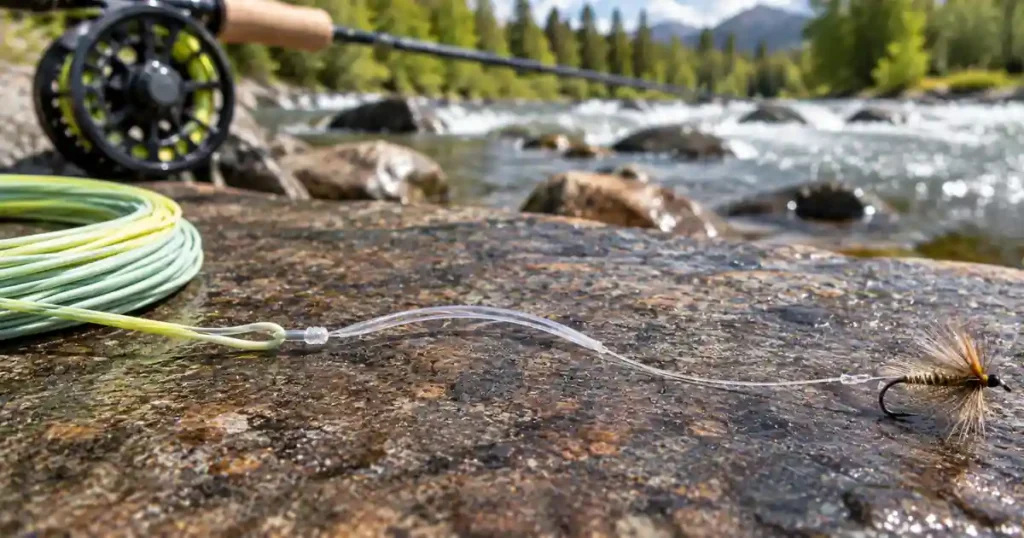
Once the fly line is on the reel, the front half of the fly fishing line setup can be completed with the leader and terminal material.
Attach the Leader to the Fly Line
Inspect the front end of the fly line.
If the fly line has a sound welded loop and the leader has a compatible butt loop, join them loop-to-loop.
A proper loop-to-loop connection should seat so the two loops interlock cleanly rather than forming a bulky tangle.
If the fly line does not have a usable front loop, other recognized connections can be used. A Nail Knot is one traditional option, and some systems add a permanent loop to a short butt section.
Use the method appropriate to your line rather than assuming every line has a factory loop.
Understand the Leader’s Taper
A tapered leader begins thicker near the fly line and becomes progressively finer toward the fly.
That taper helps transfer energy more smoothly from the fly line toward the terminal end.
Avoid accidentally installing a tapered leader backward.
Decide Whether Extra Tippet Is Needed
A fresh knotless leader already contains a fine terminal section.
You may tie the fly directly to that section when its diameter and remaining length suit the fishing.
Add separate tippet when you need to:
- Restore leader length after fly changes
- Change the terminal diameter
- Preserve the leader’s taper
- Build a fishing rig that requires another section
For help selecting diameter and material, see our guide to choosing the right fly fishing tippet.
Connect Leader to Tippet
The Double Surgeon’s Knot and Blood Knot are both established ways to join leader and tippet material.
You do not need to learn every possible connection before fishing. Pick an appropriate knot, tie it correctly, and test it.
Our fly fishing knots for beginners guide covers these connections step by step.
Finish the Fly Fishing Line Setup: Add the Fly and Inspect It
The final working step in the fly fishing line setup is attaching the fly and checking the entire chain.
Tie On the Fly
Use a suitable terminal knot for the fly and tippet material.
Common choices include:
- Improved Clinch Knot
- Non-Slip Mono Loop when a small loop connection suits the presentation
Different fly styles and materials can favor different knots, so there is no need to force one knot onto every situation.
Keep the hook point controlled while tightening and trimming the connection.
Follow the System From Start to Finish
Before fishing, trace the entire system:
Reel → Backing → Fly Line → Leader → Tippet → Fly
At each junction, ask:
- Is the correct material connected?
- Is the knot or loop fully seated?
- Is there obvious damage?
- Is anything slipping?
- Is the line facing the right direction?
Check Reel Clearance
Turn the spool and wind line normally.
The fly line should not rub the frame.
If it does, remove the fly line and reduce backing rather than trying to force the overfilled reel to work.
Test the Important Connections
Use controlled pull tests appropriate to the material.
You are looking for obvious slipping or a badly seated knot, not trying to destroy the system before fishing.
How Much Backing Should Go on a Fly Reel?
There is no universal backing amount for every fly fishing line setup.
Capacity depends on:
- Reel model
- Spool size
- Fly-line diameter
- Backing diameter
- Target species
- Intended fishing
- How much clearance the reel needs
Start with the reel manufacturer’s published capacity guidance when it is available.
Why Fixed Yardage Can Be Misleading
Two reels advertised for the same line weight can have different capacities. Two fly lines of the same nominal weight can also have different diameters.
That is why a blanket instruction such as “every trout reel needs exactly this many yards” is not reliable.
Reverse-Loading for Precise Spool Fill
If you need to determine the fill more precisely and have the necessary spare spool or line-winding setup, you can temporarily load the system in reverse:
- Put the fly line onto a spare spool first.
- Add backing until the spool reaches the desired fill.
- Transfer the complete system so the backing ends up underneath the fly line on the fishing reel.
This is an optional technique, not a requirement for every beginner.
The final goal is simple: enough backing for the intended system while still leaving enough room for the fly line to wind without rubbing the reel frame.
Common Fly Line Setup Mistakes
Many problems with a fly fishing line setup come from skipping compatibility and direction checks rather than from difficult knot tying.
Installing the Fly Line Backward
Check markings or manufacturer instructions before attaching the line.
A tapered fly line is designed with a particular casting end.
Using One Backing Amount for Every Reel
Use the capacity information for your actual reel and line.
Overfilling the Spool
Leave practical clearance between the fly line and reel frame.
Spooling Too Loosely or Unevenly
Use controlled tension and guide the line across the spool as it winds.
Assuming Every Fly Line Has Welded Loops
Inspect both ends.
If there is no usable loop, choose an appropriate direct connection.
Trusting a Damaged Loop
A factory loop is convenient, not indestructible.
Do not use a badly damaged connection simply because it came installed on the line.
Adding Tippet Automatically
A fresh tapered leader already ends in a fine terminal section. Add extra material when the fishing situation or leader condition calls for it.
Ignoring Knot Compatibility
A knot that works well with one set of materials is not automatically the best option for every backing and line combination.
Skipping the Final Pull Check
Inspect and test every important junction before fishing.
Mixing Rod Assembly Into Reel Spooling
The rod does not need to be fully assembled just to build the line system.
Physical rod assembly, reel mounting, and guide threading are a separate setup task.
FAQs About Fly Fishing Line Setup
What Is the Correct Order for Fly Fishing Line?
The normal order is:
Reel → backing → fly line → leader → tippet → fly
Tippet may be the terminal section already built into a tapered leader or an additional section you add later.
Do You Need Backing on a Fly Reel?
Backing is a standard part of most complete fly-reel setups. It provides reserve line when a fish runs beyond the fly line and helps fill the reel spool.
The amount depends on the reel, fly line, and intended fishing.
How Much Backing Should You Put on a Fly Reel?
Use the reel manufacturer’s capacity guidance as your starting point.
There is no single yardage that works for every reel. Reel size, fly-line diameter, backing diameter, and target species all affect capacity.
Which End of Fly Line Goes to the Backing?
The rear or reel end of the fly line attaches to the backing. The tapered casting end faces the leader.
Check the line markings, packaging, or manufacturer instructions instead of guessing.
How Do You Connect Fly Line to a Leader?
If both the fly line and leader have sound compatible loops, a loop-to-loop connection is simple and removable.
If a suitable loop is not present, recognized alternatives include a Nail Knot or a permanent butt-section loop system.
Do You Need Tippet With a Tapered Leader?
Not always.
A new tapered leader already has a fine terminal tippet section. Add separate tippet as the leader becomes shorter, when you need another diameter, or when a particular rig requires it.
Final Fly Fishing Line Setup Takeaway
A complete fly fishing line setup is easiest to remember as:
Reel → Backing → Fly Line → Leader → Tippet → Fly
Attach the backing securely, use reel-specific capacity rather than a universal yardage, confirm fly-line direction before spooling, use factory loops when they are sound and appropriate, and add extra tippet only when the setup needs it.
Before fishing, inspect spool clearance and every connection. Once each component is doing its intended job, your fly fishing line setup is ready to move from the reel to the rod and onto the water.
Sources Used :
- Scientific Anglers — How to Spool a Fly Reel with Backing and Fly Line — consulted for the Arbor Knot, even backing distribution, backing-capacity methods, welded-loop connections, Nail and Albright alternatives, fly-line spooling, and leader attachment.
- Fly Fishers International — Knots & Rigging — consulted for tippet terminology and recognized reel-to-fly connection methods.
- Far Bank — Essential Knots — New to Fly Episode 3 — consulted for the beginner connection sequence from backing-to-reel through leader, tippet, and fly